 This honey, nutmeg and cinnamon facial will soothe and calm your stressed-out skin while givng your skin a fresh glow. And, it smells like autumn... how can you say no to that?! Here's how it works: Honey and nutmeg are natural anti-inflammatory agents that help reduce redness and swelling in the skin. They’re also great for fighting and preventing infections that cause breakouts, as well as helping to heal acne scars. The nutmeg and cinnamon also gently exfoliate your skin if you wash the mask off using a small circular motion. Honey also does a great job of attracting moisture, so your skin will get a great nutrient boost too! NOTE: When making any homemade facial it is a good idea to do a skin test first, usually on the underside of the wrist, to make sure youre not allergic or will have a bad reaction to any of the ingredients, BEFORE applying it to your face. When your whole face is covered for a pre-big-event facial is a bad time to find out that your skin is sensitive to cinnamon... cuz you might be swollen and red for a day or two if you arent careful. So it’s always a good idea to do a small patch test with homemade mixes to make sure you don’t have a bad reaction to any ingredients.INGREDIENTS: 2 tblspns Honey 1 tspn Cinnamon 1 tspn Nutmeg Mix the 3 ingredients together to form a thick paste. Smooth over the face and allow it to set for 30 minutes then wash off with a soft cloth, scrubbing in a small circular motion to exfoliate.
TIPS:
You may want to avoid applying the paste under the eyes and around the mouth, as these areas can sting a little. Also, the paste may cause a stinging sensation when applied to scars or blemishes.
Try using 2 tspns of Pumpkin Pie Spice in place of the cinnamon and nutmeg. The clove in it will give you a fun tingling and warming sensation and the ginger in it is great for your skin too. Using this spice mix may sting slightly more than the original recipe.
So hairspray and detanglers aren't that expensive but sometimes you run out and don't have time to go to the store, or maybe you just enjoy kitchen chemistry and being self-reliant, or you may even be allergic and want to try something that has ingredients you can pronounce. Here are the recipes I found and am looking forward to trying them. They're really easy and each can be made in just a couple minutes using things most people have laying around the house.
Hairspray
INGREDIENTS:
1/2 cup water
2 teaspoons sugar
2 Tablespoons rubbing alcohol
6-8 drops essential oils (optional)
Bring water to a boil then remove from heat. Add sugar and stir until dissolved. Then add the rubbing alcohol and 6-8 drops of your favorite essential oil scent (optional). Allow to cool before pouring into your favorite spray bottle.
TIPS:
Be sure to use a spray bottle that creates a fine mist. If the droplets in the mist are too big you wont get very good coverage on your hair. I recommend re-purposing a spray bottle that once had another hair product in it.
If you like a firm hold you may want to apply more of the spray but allow 20-30 seconds for i to dry before spraying your hair down again. You may find that you only need one application to achieve your desired level of hold, or you may want to do it again.
According to the website I found this recipe on the sugar in the spray actually adds more shine to your hair, and who doesn't want that!?
Detangler
INGREDIENTS:
A spray bottle
Hair conditioner of your choice
Water
Fill your spray bottle two-thirds full with water. Add enough conditioner to fill the bottle, leaving a little space in the top so you can shake the contents. Shake the bottle well, making sure there aren't any more globs floating around. Spray the mixture into your hair and brush as you would normally.
TIPS:
Add a tablespoon or two of white vinegar to the mix for extra moisture, as well as to help balance the pH of your hair. This is especially useful if you regularly color treat your hair.
Mousse
INGREDIENTS:
2 egg whites
Whisk
Bowl
Crack eggs and separate the whites from the yolks. Whip the whites till they form stiff peaks. Apply to hair as you would regular mousse. Store any left overs in an air tight container in the fridge and use within 2-3 days.
But what if I am allergic to eggs?!
INGREDIENTS:
1cup Water
1/4th tspn Gelatin
Pan
Bring the water to a boil and stir in the gelatin. Once its dissolved allow the mixture to cool to room temperature before applying to hair as you would a regular mousse.
This exfoliating body scrub is a great way to keep your skin supple and soft with naturally moisturizing olive oil and honey. Sugar provides the abrasive agent that resurfaces the skin for a smoother texture and helps reduce the appearance of scars. Honey, a natural antibacterial, helps kill bacteria that causes body acne as well as blemishes on the face. Add some lemon for additional anti-bacterial properties and a gentle, natural way to even out your skin tone. Here's the recipe: Ingredients 1 cup olive oil 1/4 cup honey 1 tblspn lemon juice Approx 1 cup sugar Essential oils (optional) Instructions Mix wet ingredients then add sugar slowly. You may want to add more or less sugar according to your personal preference for scrub thickness. Massage over damp or wet skin for easy spreading and massage into the skin, spending extra time on high motion areas like the hands, feet, knees and elbows. When applying to the face avoid the sensitive eye area and hair line as the olive oil will cling to the hair, making your roots look oily. For extra moisturizing, wrap hands and feet with plastic wrap and cover with socks and gloves. Allow hands and feet to set for at least 10 minutes. When finished, regardless of your chosen application method, simply rinse off and pat dry. Cleansers can be used to remove excess oil left on the skin but this is not recommended, the oil left on the skin will shortly be absorbed into the skin or can be easily rubbed off while towel drying.
A few drops of lavender, tea tree, myrrh, eucalyptus, or other skin friendly essential oils can be added to the mix for improved scent and antibacterial properties. Olive oil can be substituted for any carrier oil such as almond, coconut, or jojoba.
This was submitted by reader Elizabeth L. of Florida. She says:
You should try a warmed Olive Oil hair treatment :) I'm making it a regular thing, it made my hair awesomely soft and repaired it nicely.
Just take a reasonable amount of Olive Oil* and warm it in the microwave for about 30-45 seconds.. Then lean over a sink and apply it to dry hair focusing on the ends. If your hair is wet, it will just bead up and not soak in as well
Avoid the roots as much as possible, because even with good shampooing you risk making the roots look oily, since they're almost always the least damaged and require the least amount of restoration..
Put your hair in a bun and leave on for 1 to 2 hours, then shampoo and condition as you normally would.
Do NOT Apply In the Shower
I just really have to stress not to apply the oil in the shower, or to let the oil drip into the tub or on the floor because it will make it dangerously slippery.. So when you apply, apply it over a sink.
*My hair is thick and to my shoulder blades.. It took me almost 1/4th a cup of olive oil to saturate my hair.
**Update**
1/4 cup olive oil
1 tblspn honey
1 tblspn vinegar (white or apple cider)
Heat in microwave safe bowl for 30-60 seconds. Pour over the mid-lower lengths of the hair and brush through. Avoid the roots as this will make the hair look oily. Put hair up in a bun and wrap in plastic wrap or shower cap. If possible wrap your head with a towel. Allow it to sit for at least 15 minutes, but can be left on the hair for as long as you'd like to leave it. Before shampooing use your blow dryer to heat the hair for a few minutes. Shampoo, condition, and style as usual.
This is a perfect post bleaching/highlighting moisture and repair treatment. The vinegar restores your hair to a neutral pH, the honey is a natural humectant that helps seal the protein and moisture form the olive oil into the hair. The olive oil helps reduce the appearance of split ends and protect it from heat damage. Heating the oil before application, covering the hair while the treatment sets, as well as using the blow dryer on the hair all aids in opening the hair shaft to accept the moisture from the oil and honey and allows the vinegar to neutralize any oxidizing agents that may still be on the hair from color treating it. Repeat once a month, or after every color treatment to keep hair healthy and strong.
This was submitted by our reader Alexandra B. She says:
I started using a face mask several years ago that my European ex-boyfriend's mother told me about.
Ingredients:
2 spoonfuls of sour cream
1 tsp salt (give or take, depending on how much you can handle)
Slather it on, leave it for 10ish minutes, and rinse off! It's a good exfoliator. The salt helps to dry up any blemishes you have (especially if you're a picker) and the sour cream moisturizers. I'm not going to lie, if you have sensitive skin it'll burn. But think of it as soaking your face in the ocean for a bit :P
Thanks Alex for submitting your recipe!
Essential oils such as rosemary, lavender, tea tree and others can be added for scent as well as further blemish fighting properties. Baking soda can be substituted for the salt for those with sensitive skin.
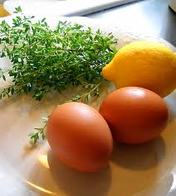 If you suffer from black heads or want to help prevent them, or just like peeling face masks then this is the one for you. The lemon is great at cutting through the oils and dirt that cause black heads as well as kills the bacteria that cause breakouts. The egg white helps tighten and brighten your skin. The tightening qualities can also help clear up old break outs.
Egg White Face Peel
1 egg white
1 teaspoon lemon juice or vinegar
Whip egg white and lemon together. Mixture should be thin.
Start with a clean face, this will help the mixture stick better. Apply on whole face, avoiding eye area. Allow to set for 20-30 minutes. Begin peeling from forehead down. Peel off as much as you can, and remove the rest with a wash cloth and warm water. After you have completely removed the mask be sure to wash your face with your favorite cleanser and follow up with a good moisturizer.
Gelatin Face Peel
1 Tbsp. of Knox unflavored gelatin
1 1/2 Tbsp. milk
Microwave for 10 seconds and apply to face. Let it dry for 30 minutes (will dry very stiff). Peel it off. Rinse face with cool water. Pat dry.
Now, you may not want to admit it, but I am sure some of you are guilty of trying these next two suggestions already. Elmer's glue and regular old scotch tape. You can use either one to spot treat but I would recommend the glue for larger areas. I also think the glue is more effective than the tape... either way, start with a clean face, and be sure to wash and moisturize afterward.
Tape
This one may sound funny, but it really does work. Get a good quality clear tape. I Sotch Tape is ok but I would go with the shiny kind over the matte finish, the adhesive seems to stick to the skin better.
Be sure to thoroughly wash and dry your face before applying the tape to any blackhead problem areas. The dirt and oils on our unwashed skin will prevent the tape from sticking to the blackheads. Press the tape firmly and allow it to sit for a few seconds, pressing a few times to ensure full contact with the skin. Then pull it off quickly.
This method is particularly fun for those of you who may be interested in seeing what kind of gunk came out of your pores.
**Note**
I definitely recommend the geltain face peel over the egg white. You get more consistent and peelable results. The egg whites can be difficult to get it to peel. I usually have to just scrub it off which defeats the blackhead removing qualities but it still gives you a nice tightening effect.
 Ingredients:
1 avocado
1 teaspoon of apple vinegar
1 egg white
3 teaspoons of olive oil
Whip egg white til it forms soft peaks and set aside. Peel, pit, and mash the avocado. Add oil and vinegar to avocado and mix until smooth. Fold in egg white till its fully incorporated.
Using your fingertips only, massage mixture onto your face in small circles. Allow to set on the face for 20-30 minutes before rinsing off with cool water. Pat face dry.
For sensitive skin:
1 avocado
2-3 drops almond oil
Peel, pit and mash the avocado, adding oil till the mixture is smooth. Massage on face and allow to set for 20-30 minutes before rinsing off with cool water. Pat face dry.
Either recipe can be turned into an exfoliating mask by adding a tablespoon or two of sugar or oatmeal. If you add oatmeal be sure to run this through the blender. Lemon can be added in place of the apple vinegar.
Alternative recipes:
1 avocado
2 tblspn plain yogurt
1 tblspn honey
Peel, pit, and mash avocado. Add yogurt and honey. Blend till smooth. Massage onto face and allow to sit for 20-30 minutes before rinsing with cool water. Pat dry.
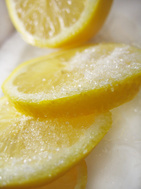 Lemon Sugar Facial ScrubIts simple. You'll need: - Lemon juice, preferably fresh
- Cotton facial pad
- Sugar or baking soda
- A good moisturizer with an SPF of 15 or higher
Saturate the cotton pad with lemon juice, diluted with a little water if your skin is sensitive, and pat it in the sugar, or baking soda if you want something that is not quite so harsh. Then rub it on your face in a tight circular pattern, adding more sugar to the pad as necessary to scrub your whole face, avoiding the eye area. Rinse your face with warm water and pat dry. Follow up with your moisturizer and try to avoid excess sun exposure for 24-48 hours after using the scrub as your skin may be extra photo-sensitive and might burn easily. This should only be done 1-3 times a week. Exfoliating too often can damage the skin, leaving you with dry, red, swollen patches of skin. The cool thing about lemon is that its a natural acid, so it will help break up oils and dead skin cells that accumulate on your skin to make it dull or too shiny. It will also help even your skin tone and lighten dark spots. The lemon helps kill the bacteria in your skin that cause breakouts and black heads. Lemon is also a good detoxifier, so be sure to make some lemonade with whatever lemons you have left over :) TonerTo give your skin a very smooth feel and reduce the appearance of pores and fine lines, as well as get rid of puffy eyes, after cleansing, you can steep a bag of black tea in water that is warm enough for you to tolerate having it on your face. The hotter, the better, within reason of course. Dip the tea bag in the water and allow it to become fully saturated. Then, draining a little excess water, rub the bag over your face. Allow the bag to sit on the under eye area till it cools. Repeat as frequently as you like. Follow up with moisturizer. Tea leaf is high in antioxidants, minerals and nutrients that are essential to healthy, young looking skin. Black tea especially is high in caffeine which helps tighten the skin, and reduce the appearance of blood vessels that are too close to the skin that contribute to dark circles in the under eye area. Witch Hazel is also a great natural astringent but it doesn't leave your skin feeling smooth like the tea treatment does... it also doesnt smell very good, so make sure you use a good moisturizer after applying it. Also, avoid applying witch hazel to the under eye area. Actually, avoid the eyes entirely... It hurts like a mother&#$%*! if you get it in your eye. I do not recommend it. ZIT ZAPPERFor a nice zit zapper, try dissolving an aspirin in a small amount of water, just enough to make it into a paste, and dab on your blemishes. I haven't been able to find anything that talks about how long it is safe to leave it on the skin, but I would imagine you should only leave it on for a few minutes, 5 at the most. But you may want to experiment with what your skin can handle. This is because aspirin has an acid in it that is very similar to salicylic acid, the active ingredient in many acne creams. As it is an acid it can potentially burn the skin if left on for too long. Since aspirin is also a pain reliever, fever reducer and anti-inflammatory agent, when applied topically it may also reduce pain and swelling in the infected area. Skin Cleanser and Facial Scrub
You can take the lemon sugar facial scrub to a whole other level by adding honey and olive oil to the mix, spread it on your face and allow it to sit for a few minutes. Olive Oil is great for trapping in moisture without clogging your pores. The honey is a natural antibacterial and antimicrobial agent, lending its strength to the already powerful zit zapping qualities of lemon. Honey is also a fantastic humectant. This means that it does a really good job of attracting and retaining moisture. Its also chuck full of anti-oxidants -always a good thing for your skin. If you dont have honey or olive oil you can substitute one or the other with Almond oil. It has similar qualities. And again, in this recipe the lemon can be diluted, and the sugar can be substituted for baking soda according to your preference. I will try to find a website that has an actual recipe for it and update this post with the link. Homemade Face Wash1 tsp. olive oil 1 tsp. honey 1/2 tsp. lemon juice Vinegar can be used for more oily skinMix together in a bowl or jar. Massage all over face, and for a nice moisturizing effect, allow it to sit on the skin a few minutes before rinsing it off with a soft cloth and cool water. Warm water can be used if you have naturally oily skin. Add a 1/4- 1/2 tsp of sugar or baking soda to make an exfoliating cleanser. Use less sugar in this than you would with a face scrub though, so as to allow you to use it daily. This recipe is awesome, and I plan to start using it regularly in place of my usual cleanser. The moisturizing effects are so awesome that you may not even feel the need to use a moisturizer.
|

 RSS Feed